
In QuickBox, you are able to add Custom Menu Links to the Navigation Panel. In order to do this, you must be comfortable with HTML coding and editing web files.
- Connect to your Server via SSH, FTP, SFTP, X2G0 or noVNC
- Navigate to /srv/quickbox/custom/
- In version 1.3.0 and above, you will see a file already created called custom.menu.php – This file will then be included in the bottom of the Navigation Panel.
- If you are using a version below v2.3.8, we strongly recommend updating to the latest release to take advantage of this article.
- Edit that file
- At the bottom of the file, by default we have added a link to the QuickBox.IO Knowledge Base. You can add your custom menu links after this using the following sample code (this file may be blank and that is ok!);
<li class="usr-img-frame rounded-circle"><a href="https://quickbox.io/knowledge-base/" target="_blank"><img src="assets/img/favicon-16x16.png" class="mr-2 img-fluid rounded-circle" style="width:18px;height:18px;background-color:#171e27;"> <span>QuickBox.IO <br/><?php echo T('KB'); ?></span></a></li>
So if we wanted to link to the a custom subdomain for an application such as Ombi;
<li class="usr-img-frame rounded-circle"><a href="https://ombi.somedomain.com/" target="_blank"><img src="assets/img/brands/ombi.png" class="mr-2 img-fluid rounded-circle" style="width:18px;height:18px;background-color:#171e27;"> <span>Ombi <br/>@ ombi.somedomain.com</span></a></li>
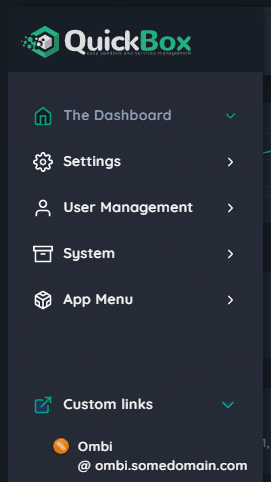
Your new Custom Link would then look like this;
There is no limit as to how many links you can add to your navigation panel.